
No products in the cart.
Outdoor Adventure
The 5 Most Helpful Tips for New Hikers
07
Aug
Aug
Normally at this time of the year, I am hustling along some absurdly long trail, trying to get from one end of the country to another at three miles per hour. But my wife and hiking partner, Tina, took a new job as a seasonal park ranger this year, meaning our thru-hikes won’t happen until the leaves begin to yellow this fall.
Instead, I committed myself to a series of guided hiking trips in some of the most staggering places in North America—a wonderfully mild British Columbia, an oppressively still Utah, a perfectly green Wyoming. Thus, throughout the summer I have hiked slowly, taking my time through forest-bathing sessions, pausing often for breaks to stand among wildflowers.
In all three cases, I’ve been surrounded by two very different types of people: voluble area experts versed in local geology and ecology, and tourists eager to learn from them. The latter group, in many cases, cannot wait to go on their first, longest, or most arduous hikes ever. It’s been incredible to see the landscape through their eyes, to watch folks who spend more time behind desks than in the woods realize how endless the wonders can be beyond a laptop screen. My favorite moment of the summer so far remains witnessing an oral surgeon from Boston stare slack-jawed at a moss-clad boulder field near Canada’s Kootenay Lake. “Oh, the color,” he muttered, as if catching his breath.
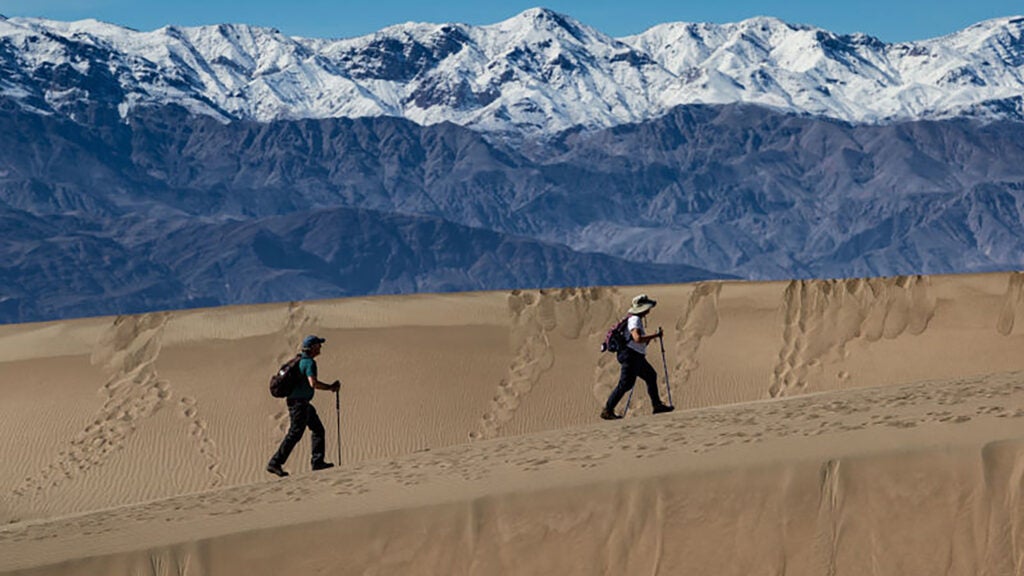
It’s been instructive, too, to observe novice backpackers attempt it one hiking pole and electrolyte pouch at a time. Most often, they are folks who have written off backpacking for one of a dozen reasons—too hard, too boring, too equipment-oriented, and so on. Walking and talking, I’ve paid attention to the things they loved and hated, that burdened them or made their loads lighter. If you’ve been intimidated by getting into the woods, here are five beginner lessons they’ve taught me while we strolled together through the summer.
Buy a Simple Hiking Bag. Always Keep it Packed and Ready to Go.
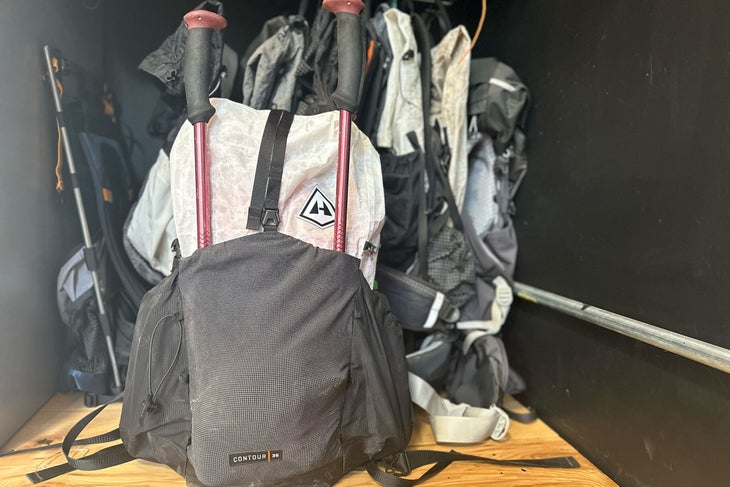
During a recent trip in British Columbia, a new friend offered a confession about why she didn’t hike in the Bay Area, where she works alongside Strava-obsessed tech bros: She couldn’t share their excitement about gear, about enthusiastically amassing things in a city for a journey into the woods. I couldn’t agree more. Most gear is secondary or even tertiary to getting outside. Sure, the hiking-industrial complex is real and, to an extent, important, forever concocting a better widget for you to take into the wilderness. But the equipment you need to start hiking is pretty minimal—a backpack packed with snacks, water, a rain jacket, a layer or two should the weather change, a simple first aid kit, and maybe a headlamp in case you don’t finish as soon as you expected.
You do not need to buy some outsized Osprey or sleek Hyperlite before you begin. I’ve seen very serious hikers go hundreds of miles in Jansport backpacks. (Ultralight guru John Zahorian is even replicating that classic kids look with his new company, Meadow Physics.) So start with whatever spare bag you have around the house or find in a thrift store, keep it loaded with the aforementioned essentials, and go when the time is right. Hiking can and should be simple.
Get a Professional Fitting for Hiking Footwear
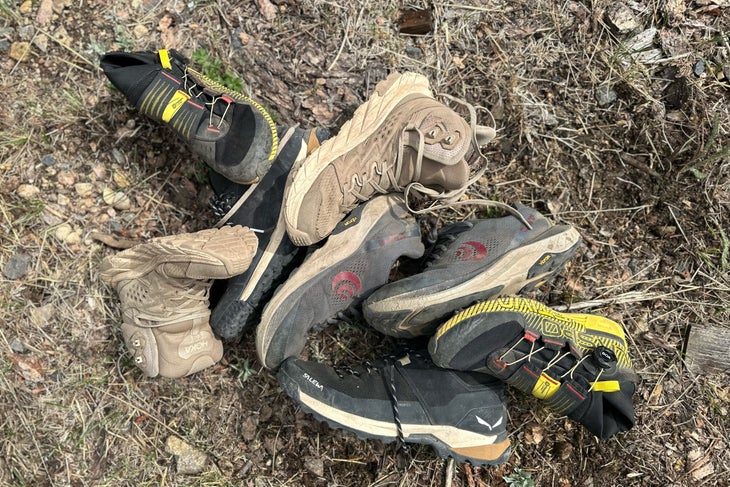
Here is a little parable from the outdoor industry. Every so often, a brand invites writers on a trip to try out not only its new gear but also that of companies it considers partners. You arrive at a hotel to find a mountain of stuff to sample. A few weeks back, I joined a coterie for a three-day trek into the Wyoming Range, the wildflowers a riot of summertime splendor. With three miles left, a guide pointed out a rare flower, and I commented on the blessed afternoon breeze. But at that precise moment, one companion was wincing too much to marvel at either. Her new hiking boots—part of this particular junket’s raft of supplies—had made mincemeat of her feet. A blister beneath a toenail popped. Rightfully, she later offered to donate those boots to a local outdoor charity.
Let this be a lesson: Shoes are the one piece of hiking gear on which you should not scrimp. If you finish your first hike with fucked-up feet, why would you go back out? Go to a running store, tell them about your goals and history, and spend as long as it takes to find a pair of shoes that feels great. (Notice I didn’t say boots. You don’t need boots.) Your feet will swell, so size up slightly. And if you have tender skin, consider toe socks, too. Folks will tell you that a specific brand is best, but that is bollocks. I am a diehard Topo apostle, but I have friends who can’t stand them. Shoes are entirely personal, though having a pair that works for you is the only mandatory hiking universal.
Learn Something About the Region Where You’re Hiking
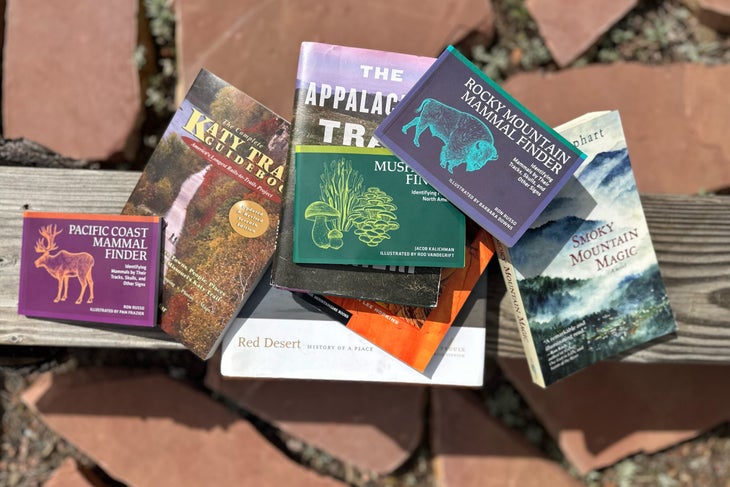
On the first day of a week-long REI trip atop the glorious Colorado Plateau, a guide pointed out a bird flitting between the red rocks and green pinyons of Capitol Reef: “A canyon jay,” she said. It was almost certainly a Woodhouse’s Scrub-Jay, but I liked that reductive and evocative little name more. We would spend the next several days surrounded by canyons, after all, and the bird’s faint flash of color immediately prompted “jay.” Over the next several days, I heard the phrase dozens of times from the retirees or near-retirees in our group, saying it with a sort of astonishment whenever they saw one fly past. It had become their way into the landscape, a piece of information that made them feel like interpretive park rangers in training. They heard lots about sedimentation, uplift, and erosion, pronghorns, Coues deer, and whiptail lizards. But it was the “canyon jay” that stuck.
When you decide where it is you’re going, learn something specific about the landscape, something you can take with you and look for as you walk. Maybe it’s the name of a bird or plant, some tell-tale sign of glaciation or deposition, or even traces of long-ago human history. When the temperature starts to tax you or your legs get weary, keep these facts in mind and try to spot them on trail to keep you entertained and motivated. A plant or animal identification app—maybe Seek by iNaturalist or Merlin from the Cornell Lab of Ornithology—can help, but do some research in advance, as if you’re planning to play Punch Buggy with nature.
Ditch the Hydration Bladder and Bring a Bottle
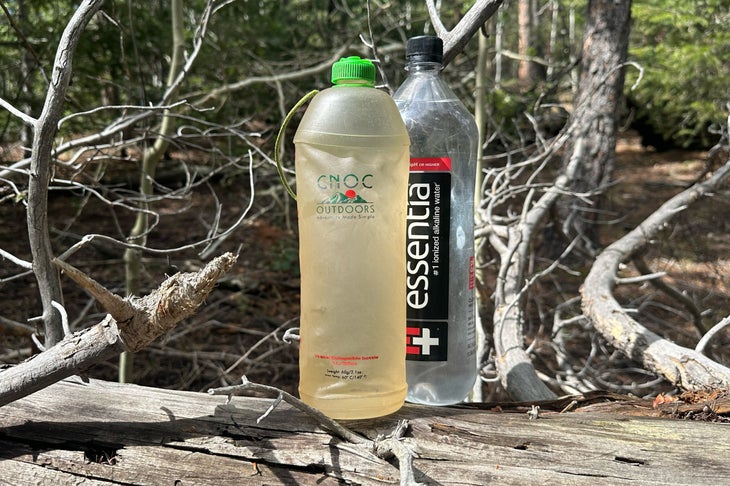
In British Columbia, Utah, and Wyoming, there was one requirement I resented: a water bladder. Whether we were going for a day hike that would last a few hours or headed into the backcountry for several nights, each guide wanted each hiker to strap three liters of water to their back and steadily take sips as we moved. In my experience, it takes time to make water from a new bladder taste like anything other than plastic. Flavor notwithstanding, this is just bad advice. When a water bladder is crammed into your backpack, you have no sense of how much you’ve actually been drinking unless you stop moving and pull the thing out. What’s more, having constant access to that gigantic straw means you don’t take breaks because you can swallow as you stroll. I watched folks, myself included, wrestle with bladders on every outing. At least I didn’t see one burst.
May I suggest, then, the wonderful inconvenience of a few one-liter water bottles? Fill them up before you start, and stuff them in your side pockets or, if you don’t have them, into your bag’s central cavity. It will take practice to get them out and in while still moving, meaning you’ll have to stop and catch your breath from time to time. That’s good. You can also keep easy track of how much you’ve had and ration your water as need be. Unlike bladders, you can mix electrolytes, coffee, or flavors into bottles without creating a potential problem. Unless you’re running trails, bladders are an unnecessary expense too often recommend to beginners for no real reward. Skip them.
When You Stop, Prop Your Hiking Poles Against Something
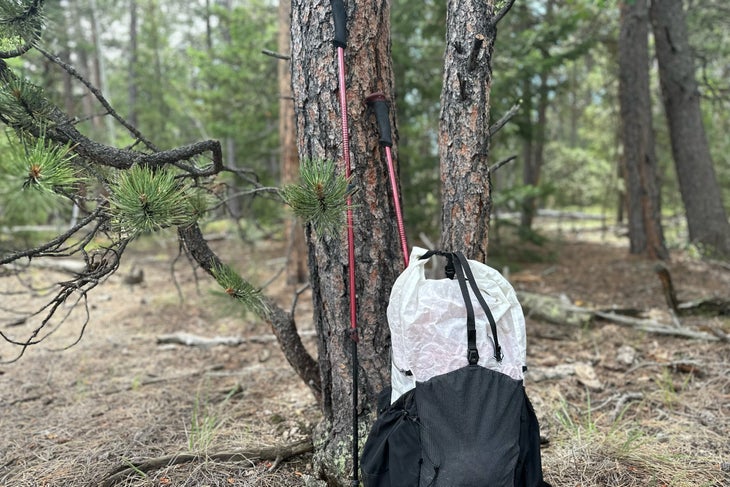
I put down my hiking poles a few thousand miles ago, since I found that dealing with them distracted me so much from my feet that I tended to fall more. These days, I mostly keep one in my bag for setting up a tent at day’s end and use it on trail only when things get especially gnarly. But as you start hiking, they’re a good idea for balance and support. Extend them until your elbows are at 90 degrees, then lengthen them for downs and shorten them for ups. But for the love of your back and hips, do not throw them on the ground when you take a break. Lean them against a tree or dig their points into the dirt so they remain upright, or so that you do not have to bend over while wearing a pack to get them. This is the simplest way to make your backpacking life less tedious. If we ever hike together, I will pick up your poles so you don’t have to.
Speaking of poles, I learned a new trick on that Wyoming trek. When you stop, simply tuck them behind your back and under your bag at an angle. You’ll create a tripod of sorts, so that the poles rather than your shoulders support the weight of your pack while you’re at rest. There’s going to be a learning curve, of course, meaning the poles will inevitably slip out and fall down. Maybe I’ll be around to grab them.