
No products in the cart.
Outdoor Adventure
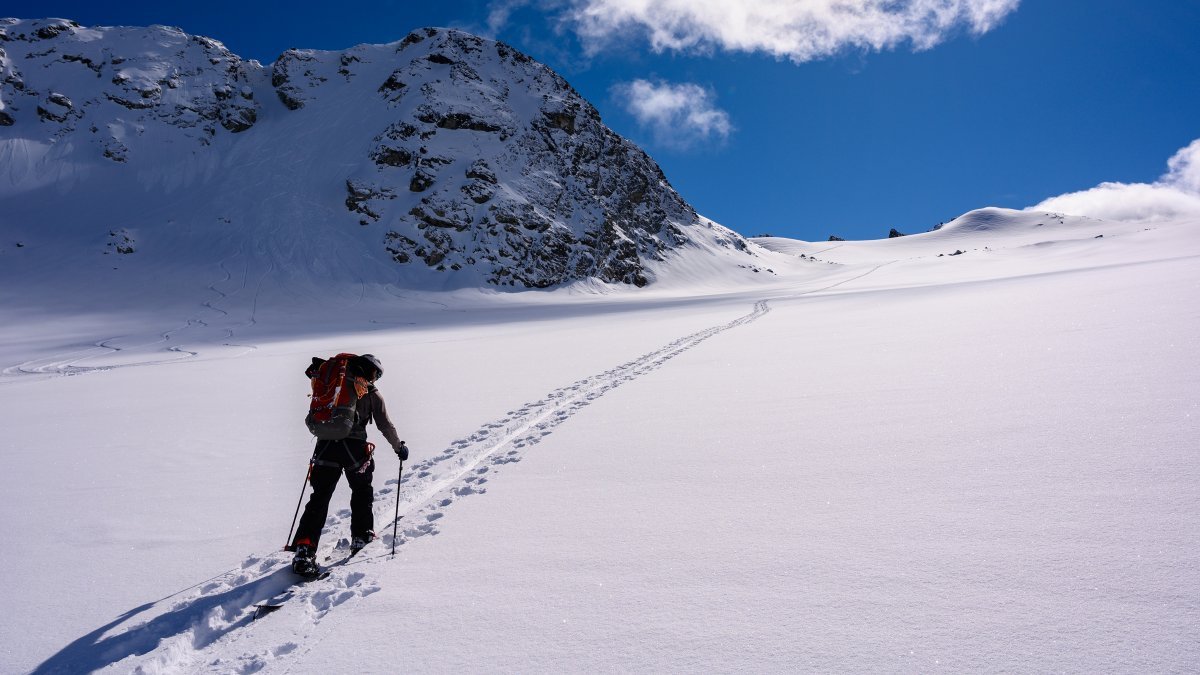
A Beginner’s Guide to Splitboarding
27
Dec
Dec
With the coronavirus still raging as we head into winter, I opted out of buying a pass to my local mountain this year. I’m avoiding crowds at all costs, but that doesn’t mean I’m hanging up snowboarding for the season. I figured it’s finally time to learn what all the backcountry-touring fuss is about—and I know I won’t be the only newbie strapping into a splitboard in search of untracked pow and a new form of cardio.
Backcountry participation is surging, according to gear manufacturers and educators. Splitboard maker Weston had its biggest month ever in September, before the season even started, according to owner Leo Tsuo. Other brands are quickly selling out of inventory, both online and in stores. And many avalanche-education courses are already booked through spring.
If you’re among the first-time splitboarders avoiding the lifts this year, here’s what several athletes and professional mountain guides recommend in terms of safety courses, gear, and planning your first trip.
Certification and Education
In the backcountry, nobody is grooming the runs into perfect strips of corduroy or blasting away avalanche hazards. It’s just you, your friends, and the snow. That’s the beauty of it—but it’s also the danger. Last season in the U.S., 23 people died in avalanches, four of whom were skiing and riding in-bounds, according to the Colorado Avalanche Information Center.
Before you even venture onto untouched powder, it’s essential to get certified in avalanche safety and hone your fundamental outdoor skills, says Izzy Lazarus, a professional mountain guide and an avalanche educator in Jackson Hole, Wyoming. Your life—and your friends’ lives—depend on you knowing how to react in the event of an emergency. Your backcountry partners are crucial to your own survival, so find a crew of people who you know are serious about safety and who will push you to develop your mountain sense through the proper educational channels and lots of practice.
The American Institute of Avalanche Research and Education, better known as AIARE, is the gold standard for teaching skiers and riders in the U.S., Europe, and South America, mostly due to its well-known and widely available programming, Lazarus says. (Avalanche Canada is our neighbor to the north’s main organization.) The nonprofit supplies research-based curriculum to guides and course providers across the country, who then offer various training weekends—priced between $250 and $500—throughout winter.
The beginner course, AIARE Level 1, consists of 24 hours of lectures and time in the field, usually three days. AIARE partnered up with Weston this year to offer several scholarships toward the price of a course for women, BIPOC, and LGBTQ+ folks. In this cornerstone class, you learn how to assess avalanche hazards, make informed decisions, and rescue someone in the event of a burial. Avalanche Rescue and AIARE Level 2, the next courses in the sequence, cover companion rescue and risk assessment in further detail. Find AIRE courses in your area, or those offered by other certified providers, at Avalanche.org.
In preparation for the season, several organizations and brands (including 57hours, Mammut, and Weston) hosted online avalanche-awareness sessions for the public. You can also access online classes through a program called Know Before You Go. Until my home of Flagstaff, Arizona, gets more snow, I’m taking notes on these online classes to prep myself for an avy course come spring. These aren’t substitutes but supplements; the more you know, the safer you and your backcountry partners are.
Essential Gear
Any backcountry traveler will tell you that a beacon, probe, and shovel are the three most important pieces of avy gear in your kit. They’re your life-saving devices, and an avalanche-safety course (and subsequent practice) will familiarize you with their functions. Whenever you head into the backcountry—or even on big powder days at the resort—check your safety equipment befire you go. Adam Zok, a guide in Revelstoke, British Columbia, recommends bringing a 30-to-40-liter pack to fit all your gear and layers.
Unless you’re planning on boot-packing or snowshoeing up the mountain (which is doable but requires more gear and effort), you’ll need a splitboard—a snowboard that can be split vertically and used like skis to walk uphill. The first splitboard was a solid board sawed in half, but the technology has come a long way. Burton, Jones, K2, and Weston are a few of the leading splitboard manufacturers. A board with plenty of camber beneath your bindings is your friend on the ascent, Lazarus says. It’s easier than a rocker profile to flatten when weighted, and more contact with the snow makes it easier to travel uphill, she says.
Skins, or strips of fabric made of directional nylon or mohair fibers, are also necessary. Strapped to the bottom of each plank, skins are designed to grip the snow’s surface as you trek uphill—those directional fibers prevent you from sliding backwards—but glide when you’re moving forward. Like skiers, you’ll also want some poles to help with stabilization and efficiency while headed up the mountain. Pick a pair that collapses or folds, like Black Diamond’s Expedition 2 Pro ($120) or Leki’s Tour Stick Vario Carbon ($200), so you can store them in your pack for your descent.
Some splitboard-specific boots are better for the uphill, such as the Thirtytwo TM-2 XLT ($350) or the Vans Hi-Country and Hell-Bound boots ($330), but the best footwear is what you already have. Zok says regular resort boots will work for splitboarding, but keep in mind that walking will wear them out faster than simply using them to ride at a resort. However, you will need new splitboard-specific bindings that face your board’s nose on the way up and then change to your preferred stance for the way down. The Karakoram Free Ranger ($400) and Spark R&D Arc ($385) are popular choices. For some bindings, you’ll also need pucks that are sold separately. Check with manufacturers about which bindings and boards are most compatible, as you’ll want bindings that don’t interfere with the connection system locking your board’s halves together.
Lastly, like any day on the mountain, remember to wear a helmet, gloves, and layers. Your body temperature will run warmer since you’re moving more, so choose layers that breathe and wick moisture away. But for your safety, make sure your clothes are insulating and waterproof, because there aren’t any public warming huts in the backcountry.
Planning a Trip
Once you’re ready for your first day in the backcountry, there are a few ways to go about organizing a trip. Rob Copollilo, a mountain guide based in Chamonix, France, suggests staying out of avalanche-prone terrain for your first year so you can get used to the gear and backcountry conditions. He even suggests getting used to your new splitboarding equipment in low-risk areas before getting certified. Guidebooks, maps, and friends can point you to low-angle slopes (less than 30 degrees) that pose fewer risks. It’s also wise to check with local avalanche centers, which often post daily snow-report bulletins.
The easiest way to get used to your gear is at your local ski resort’s track. Many locations create uphill runs that are either free to access or accessible at a reduced price. In Colorado, riders and skiers can learn the basics at the 1,200-acre Bluebird Backcountry uphill-only area. Ski patrollers are on hand to mitigate avalanche hazards, and guides are available to help with navigation.
You can also hire a guide through a local outfitter or 57hours, which connects clients with professionals. However you get out, make the most of your first journey by heading into the woods with a team of trustworthy and safety-conscious friends who have similar goals for the day.
Support Outside Online
Our mission to inspire readers to get outside has never been more critical. In recent years, Outside Online has reported on groundbreaking research linking time in nature to improved mental and physical health, and we’ve kept you informed about the unprecedented threats to America’s public lands. Our rigorous coverage helps spark important debates about wellness and travel and adventure, and it provides readers an accessible gateway to new outdoor passions. Time outside is essential—and we can help you make the most of it. Making a financial contribution to Outside Online only takes a few minutes and will ensure we can continue supplying the trailblazing, informative journalism that readers like you depend on. We hope you’ll support us. Thank you.
Lead Photo: stockstudioX/iStock
Source link