
No products in the cart.
Fitness Tips
A Complete Guide to Hiking and Climbing California's 14ers
18
Apr
Apr
Here are 15 rugged reasons to tear yourself away from Colorado’s attention-hogging 14ers and tackle the Golden State’s.
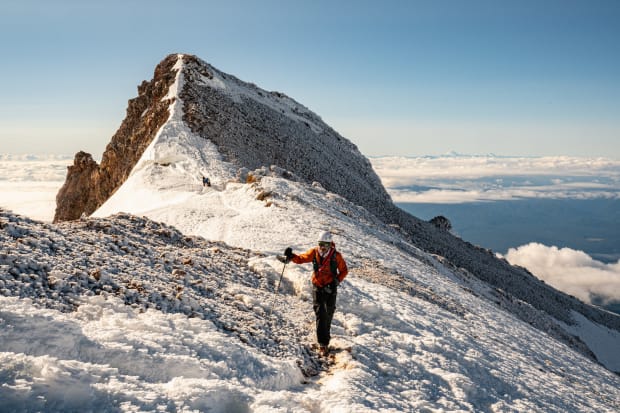
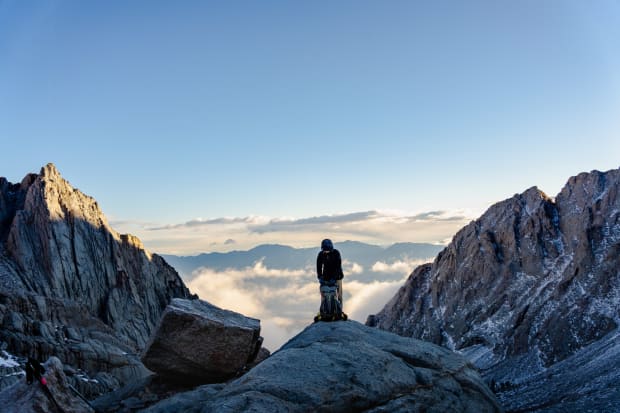
California is home to 15 summits that exceed 14,000 feet of elevation (hence the term 14er), including the tallest mountain in the Lower 48. While Colorado may hog the spotlight with 58 peaks above this benchmark height, scaling the Golden State’s 14ers is its own singular achievement—one that often requires more skill and longer days. Yes, there are far fewer 14ers out here than in Rocky Mountain country, but they’re generally a whole lot harder to climb.
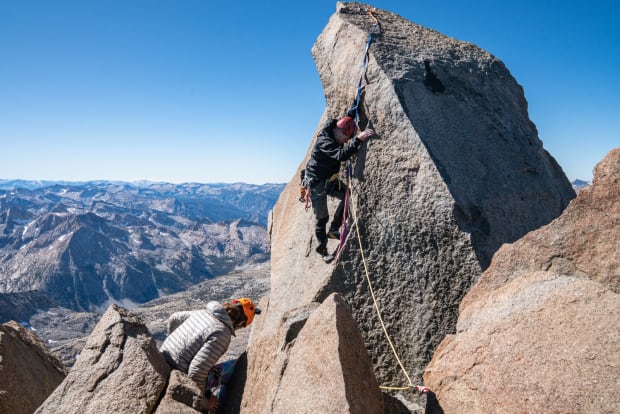
California’s summits require technical rock climbing up to 5.9 (moderate range) and mountaineering gear, including an ice axe and crampons year-round. In addition to their heightened technical demands, most of California’s 14ers involve more than 5,500 feet of vertical gain and 15 miles round-trip, requiring several days to complete a single peak for the average summit seeker.
What Is a 14er?
Owing to the difficulty of climbing California 14ers, climbers have loosened the tighter Colorado rules attached to Rocky Mountain peak bagging, which require all ascents and descents be done on foot and include a minimum of 3,000 feet of gain and loss respectively. Also, Colorado defines a 14er only if the peak has a saddle with a prominence of 500 feet between summits. If California followed this guideline, its number of 14ers would be reduced to 11 or 12 peaks.
Conversely, California has adopted the looser 14er-climbing criterion: “Be honest about how to summit every peak when sharing.” In other words, there are no hard-and-fast guidelines that constitute a successful Cali climb aside from simply and truthfully stating how it was accomplished. Did you traverse to every peak, for example, or climb every mountain from the base? Did you base jump or paraglide off of the summits, or mountain bike to the top, or skip the dicey summit blocks (a growing trend for Starlight and Thunderbolt for safety reasons for soloists) at the top? It doesn’t matter, as long as you summited and specified how you did it.
Ready to test yourself on Cali’s greatest peaks? Here’s a rundown of the state’s 15 monster mountains and how to approach them—from ideal routes and recommended gear to what to expect when going for the summit.
Complete Guide to Hiking California’s 14ers

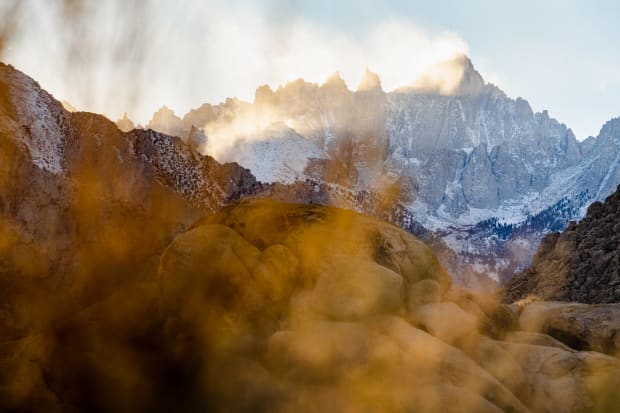
1. Mount Whitney (14,505 feet)
The tallest mountain in the Lower 48, Mount Whitney is a heavily sought-after hike to the summit that often takes between 20 to 23 hours. While most would likely prefer to tackle this peak over several days, the difficulty with permitting, established for conservation purposes, prevents many from overnight trips.
Standard Route:
- Mount Whitney Trail
- 6,600 feet of vertical gain
- 21 miles round-trip
- Hiking trail
Trailhead:
Whitney Portal
Average Time to Climb:
1 day
Red Tape:
Permits for the Whitney Zone are a lottery system, so apply and cross your fingers you get something. Because of the permitting system, most people are forced to day hike this trail, as overnight permits are rare to win in the lottery.
If you don’t win the lottery, you can always try for a “same-day” (or “walk-up”) permit. The name of these permits is somewhat misleading as they’re released the Sunday before online at recreation.gov.
Gear Needed:
- Day pack with water and snacks
- Approach shoes
- Positive attitude
- Extra layers as the weather can change quickly and intensely
2. Mount Williamson (14,379 feet)
The far lesser-known and more demanding second tallest peak in California, Mount Williamson only sees a few summitings every year. This peak is remote and often takes teams 10 to 12 hours just to reach the mountain’s base. Once on the mountain, be ready to stem your way to the summit ridge via a fourth-class chimney that some have called a 5.2 and guidebooks often underestimate as third class. While you’re here, consider climbing in conjunction with Mount Tyndall.
Standard Route:
- West Face
- 10,500 feet of vertical gain
- 27 miles round-trip
- Fourth-class scramble
Trailhead:
Shepard’s Pass
Average Time to Climb:
3 days
Gear Needed:
- Overnight gear
- Approach shoes
- Helmet. There’s a significant amount of rockfall.
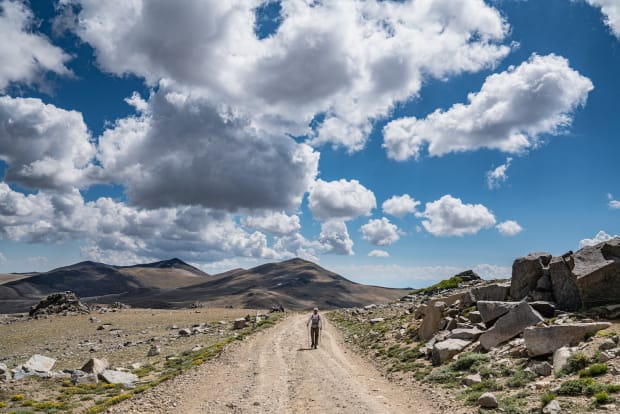
3. White Mountain (14,252 feet)
One of the few 14ers outside the Sierra Nevada Mountains, White Mountain stands alone across Owens Valley. It’s California’s easiest 14er along its lengthy but straight forward 4×4 trail to the summit.
Standard Route:
- White Mountain Peak Trail
- 3,400 feet of vertical gain
- 15 miles round-trip
- Hiking trail
Trailhead:
White Mountain Peak Trailhead
Average Time to Climb:
1 day
Red Tape:
Driving the dirt roads to the trailhead, as they can often wash out after heavy rains.
Gear Needed:
- Day pack filled with water and snacks
- Approach shoes

4. North Palisade (14,248 feet)
North Palisade is a peak with many faces. Flanked with a glacier on the eastern side and a dry western aspect, it’s the perfect mountain for budding alpinists to hone their skills.
Approaching from the east resembles climbing in Washington’s Cascades, as you cross a small glacier and bergschrunds while donning an ice axe and crampons. The easier, far more common summit bid from the west is typically dry by late summer and can be done via fourth-class scrambling.
While below is the standard route for North Palisade, there’s an iconic traverse, linking across the North Palisade Massif from Mount Sill to Thunderbolt Peak (or vice versa) that ticks off five of California’s 14ers in one shot.
Standard Route:
- West Chute
- 5,800 feet of vertical gain
- 16 miles round-trip
- Fourth to low fifth class
Trailhead:
Bishop Pass (south lake)
Average Time to Climb:
3 days
Gear Needed:
- Overnight gear
- Rope, to repel off the summit
- Harness and helmet
- Approach shoes
5. Starlight Peak (14,206 feet)
Starlight Peak is a wild and challenging climb for most peak baggers. Approaching the mountain and reaching the summit block of Starlight requires climbing a 50-foot 5.3 headwall. Like Thunderbolt Peak, this one comes with a controversial summit block debate: Have you really summited if you didn’t stand on top of the block? Debate amongst yourselves, but just know this summit block can be dangerous and should be taken seriously.
While below is the standard route for Starlight Peak, an iconic traverse linking the North Palisade Massif from Mount Sill to Thunderbolt Peak (or vice versa) will bag five of Cali’s 14,000-foot peaks in a single climb.
Standard Route:
- Northwest Chute
- 5,200 feet of vertical gain
- 15 miles round-trip
- 5.6 summit block
Trailhead:
Bishop Pass (South Lake)
Average Time to Climb:
3 days
Red Tape:
There’s no gear to be placed on the summit block, so individuals who don’t want to solo the summit block will need to bring an additional rope to “sling” the summit for protection.
Gear Needed:
- Overnight gear
- Rope
- Harness and helmet
- Additional rope for slinging the summit block
- Traditional rock climbing gear if uncomfortable soloing fourth class into low fifth class
6. Mount Shasta (14,179 feet)
Straying the farthest away from all the other 14ers in California, Mount Shasta is one of the southernmost volcanoes in the Cascade Range. This glaciated volcano is a wonderful introductory mountaineering peak as you battle strong winds, false summits, and snow travel with crampons and an ice axe. Climbing Mount Shasta is unlike any other 14er in California.
Standard Route:
- Avalanche Gulch
- 7,000 feet of vertical gain
- 5 miles round-trip
- Moderate snow travel
Trailhead:
Bunny Flat
Average Time to Climb:
3 days
Red Tape:
Be sure to acquire your summit permit before you climb.
Gear Needed:
- Overnight gear
- Rope (if using glacial travel techniques)
- Ice axe and crampons
- Double wall boots
- Harness and helmet

7. Mount Sill (14,159 feet)
As a stand-alone peak, Mount Sill might be my favorite summit of the California 14ers. The most popular route, Swiss Arete, ascends a stellar granite arete for three to seven pitches, depending on where you access. Requiring glacial travel, speed, endurance, creative route finding, and rock climbing skills, Mount Sill unites many of the challenging aspects of alpine climbing.
If rock climbing isn’t your forte, there’s a fourth-class route that ascends to the summit, but over the years it’s degraded and become more challenging. For safety, I’d suggest acquiring the skills to climb Swiss Arete or make the long and arduous approach from the west.
While below is the standard route for Mount Sill, an iconic traverse, linking across the North Palisade Massif from Mount Sill to Thunderbolt Peak (or visa-versa) notches five of California’s 15 14,000-foot peaks in one shot.
Standard Route:
- Swiss Arete
- 6,600 feet of vertical gain
- 21 miles round trip
- 5.6 alpine rock route with glacial traverse
Trailhead:
North Fork of Big Pine
Average Time to Climb:
3 days
Gear Needed:
- Overnight gear
- Light alpine rock climbing rack to 3 inches
- Rope (60 meters recommended)
- Ice axe and crampons
- Harness and helmet

8. Polemonium Peak (14,106 feet)
Polemonium Peak is a somewhat forgotten peak, and many don’t climb it as a stand-alone mountain as it’s dwarfed by the summits surrounding it. That said, this mountain is well worth the challenge.
While below is the standard route for Polemonium Peak, a traverse linking the North Palisade Massif from Mount Sill to Thunderbolt Peak (or visa versa) bags five Cali 14ers in one climb. And no, you don’t need to follow the Colorado Rule to consider it a summit.
Standard Route:
- U-Notch
- 6,600 feet of vertical gain
- 22 miles round-trip
- 5.2 alpine rock, glacial travel
Trailhead:
North Fork of Big Pine
Average Time to Climb:
2 to 3 days
Gear Needed:
- Overnight gear
- Light alpine rock climbing rack
- Rope (60 meters recommended)
- Ice axe and crampons
- Harness and helmet
9. Mount Russell (14,094 feet)
Mount Russell requires the most technical rock climbing skills to reach the summit, but that shouldn’t hold you back more than inspire you to grow. The most popular route to climb Mount Russell is the Fishhook Arete, which has two pitches of 5.8/5.9 climbing and is eight to 10 pitches long.
Since the approach to Mount Russell starts at the Whitney Portal, many might ask, Why would you climb Mount Russell if you can climb Mount Whitney? I can think of some reasons. If you can score an overnight permit, consider climbing Whitney, Mount Muir, and Mount Russell together.
Standard Route:
- Fishhook Arete
- 5,700 feet of vertical gain
- 9 miles round-trip
- 5.9 alpine rock
Trailhead:
Whitney Portal
Average Time to Climb:
2 to 3 days
Red Tape:
Permits for the Whitney Zone are on a lottery system, so cross your fingers that you snag an overnight permit. If you don’t, you can try for a “same-day” permit—which is actually released the Sunday before your climbing day online at recreation.gov.
Gear Needed:
- Overnight gear
- Alpine rock climbing rack to 3 inches
- Rope (60 meters recommended)
- Harness and helmet
Getty

10. Split Mountain (14,064 feet)
Comparable to many of the remote summits in Colorado, Split Mountain is arguably tougher to reach than to climb. The roads to its trailhead at Red Lake Trail can be hard to navigate, require four-wheel-drive, and often have locked gates. In recent years, fires in the area have limited access to the mountain. Thankfully, the roads are back open.
Beginning around 7,000 feet at the Red Trail, Split Mountain climb is a third-class scramble to the summit that often takes a few days to complete.
Standard Route:
- North Slope, 3rd-class scramble
- 7,400 feet vertical gain
14 miles round trip
Trailhead:
Red Lake Trail
Average Time to Climb:
2 to 3 days
Red Tape:
The dirt road to the trailhead is prone to washouts. A gate may be locked en route, cutting off access to the trailhead.
Gear Needed:
- Overnight gear
- Approach shoes
Getty
11. Mount Langley (14,032 feet)
Mount Langley is the second-easiest 14er in California and a great starting point if you aspire to climb all 15 of these great peaks. This is a long hike with a short and safe scramble to the summit. Overnight permits for the area are easy to get, so I suggest taking your time with this peak and swimming in as many of the Cottonwood Lakes as possible. For a greater challenge, day hike Mount Langley from Cottonwood Lakes Trailhead or the Tuttle Creek route.
Standard Route:
- Old Army Pass
- 4,500 feet of vertical gain
- 23 miles round-trip
- Hiking trail with some scrambling
Trailhead:
Cottonwood Lakes Trailhead
Average Time to Climb:
1 to 2 days
Gear Needed:
- Day pack filled with water and snacks
- Approach shoes
- A positive attitude
12. Mount Tyndall (14,025 feet)
One of the longest (and coldest) days of my life was spent hiking Mount Tyndall, but you needn’t be like my climbing partner and me. Mount Tyndall is a long single-day outing that I wouldn’t wish upon anyone, so do yourself a favor and opt to scale this phenomenal peak over two or three days instead. Yes, you’ll need to pack more food, but your mental game will be much stronger.
The route is straightforward, the views are gorgeous, and the required effort level remains high. Clocking in at about 25 miles and 9,000 feet of vertical gain, you should be willing to suffer to bag the summit of Mount Tyndall. While you’re in the area, consider climbing in conjunction with Mount Williamson if time allows.
Standard Route:
- North Rib
- 8,900 feet vertical
- 25 miles round-trip
- Third-class scramble
Trailhead:
Shepard’s Pass
Average Time to Climb:
3 days
Gear Needed:
- Overnight gear
- Approach shoes
13. Mount Muir (14,018 feet)
Mount Muir sits on the same massif as its better-known neighbor, Mount Whitney, and many climbers aren’t aware that it’s actually a separate peak. While Whitney baggers tromp right past it, Muir is accessed right after the Whitney Trail’s famous 99 switchbacks by a relatively quick 20-minute scramble. While there may be at least 100 other humans on this trail, you’ll likely be all alone on the summit of Mount Muir.
Standard Route:
- Mount Whitney Trail
- 5,900 vertical feet
- 21 miles round-trip
- Third-class scramble
Trailhead:
Whitney Portal
Average Time to Climb:
1 very long day
Red Tape:
Permits for the Whitney Zone are on a lottery system. If you don’t snag an overnight permit, you can try for a “same-day” permit released the Sunday before online at recreation.gov.
Gear Needed:
- Day pack filled with water and snacks
- Approach shoes
- A positive attitude
14. Middle Palisade (14,018 feet)
Middle Palisade is the perfect combination of challenge and relative ease. This peak should be climbed as your third or fourth 14,000-foot peak as it provides a good idea of the skill set required to climb California’s other 14ers without getting in over your head.
The route requires off-trail navigation as well as some scrambling on third-class terrain—or, according to some climbers, fourth class at the start of the Northeast Face due to loose terrain. You’ll need to keep your wits and move diligently through this section.
The summit and approach views for Middle Palisade are some of the best I’ve experienced in the mountains of California. You get to cross a river, jump in alpine lakes, experience some extreme exposure, and engage in a challenging summit adventure.
Standard Route:
- Northeast Face
- 6,900 feet of vertical gain
- 21 miles round trip
- 3rd-class scramble
Trailhead:
South Fork of Big Pine
Average Time to Climb:
2 to 3 days
Gear Needed:
- Overnight gear
- Approach shoes
- Mosquito repellent
15. Thunderbolt Peak (14,009 feet)
Thunderbolt Peak is a heart-fluttering summit. The Southwest Chute approach from Bishop’s Pass offers pure solitude and requires constant perseverance. Reaching the peak’s famed summit block requires several hours of scrambling, rock climbing a 5.5 headwall, then traversing a long and narrow catwalk where a fall would be fatal. Most will take three days to complete this climb.
This peak, like Starlight Peak, has an ongoing summit block debate about whether or not you’ve technically summited if you didn’t stand on the very top. You be the judge. Either way, treat the summit block carefully and seriously.
While below is the standard route for Thunderbolt Peak, a traverse across the North Palisade Massif from Mount Sill to the top of Thunderbolt (or visa versa) will bag five 14er climbs in one shot.
Standard Route:
- Southwest Chute
- 6,100 feet of vertical gain
- 19 miles round trip
- 5.8 summit block
Trailhead:
Bishop Pass (South Lake)
Average Time to Climb:
3 days
Red Tape:
There is no gear to be placed on the summit block, so individuals who don’t want to solo the summit block will need to bring an additional rope to “sling” the summit for protection.
Gear Needed:
- Overnight gear
- Rope
- Harness and helmet
- An additional rope if slinging the summit block
- Some traditional rock climbing gear if uncomfortable soloing fourth class into low fifth class
Source link