
No products in the cart.
Fitness Tips
DIY Ski and Snowboard Repairs Every Outdoorsman Should Know
16
Nov
Nov
Remember that time some guy ran into your snowboard in the lift line? Or that time you rode off your buddy’s shed and landed atop the only rock on the property? Or how about when your skis fell over outside the chalet, then you left them in a wet ski bag all summer in the basement? Well, there’s a high chance these high-impact, dampening instances took a toll on your gear. Small scratches don’t need to be repaired, but full-on core shots, along with edge damage, should be fixed to as soon as possible to maintain the longevity and performance of your shred stick(s). Here are some common DIY ski and snowboard repairs you should know.
DIY Ski and Snowboard Repairs: #1. Core Shots
Core shots are gouges in your base that expose the fiberglass or wood core. They’re often caused by riding over sharp and jagged surfaces. It’s an easy fix, but make sure to clean and dry out the impacted area before getting started.
Here’s what you’ll need:
- P-tex (the base material used in skis and snowboards; you can buy standard P-tex at your local board shop)
- Standard lighter or matches
- A good workbench in a space that’s well-ventilated
- Metal scraper
- Sandpaper
- Epoxy (optional)
Directions:
- Start by cleaning up the impact zone. Shave away any pieces of rock or debris that may be lodged in the case, and remove loose bits of material that lost integrity during the impact. If the gouge is deep and particularly concerning, apply a thin coat of epoxy to seal and strengthen the damaged area.
- Once the area is clean and solid, scuff it up with sandpaper to create a roughened area for the P-tex to cling onto. Wipe away any new debris with a cloth.
- In a well-ventilated area, hold your lighter to the end of the P-tex stick until it’s flaming. Aim to keep the flame burning blue in color and low in height to ensure a strong bond. Hold the burning stick over the gouge and let the material melt into the crater. Keep a metal scraper handy to remove any unwanted drips. Slightly overfill the hole.
- When the P-tex has dried up, grab your metal scraper and scrape away excess material until the hole sets flush with the base. If there are still holes, repeat the step above.
- Once flush and cooled, apply a fresh wax, and your ride should feel as good as new.
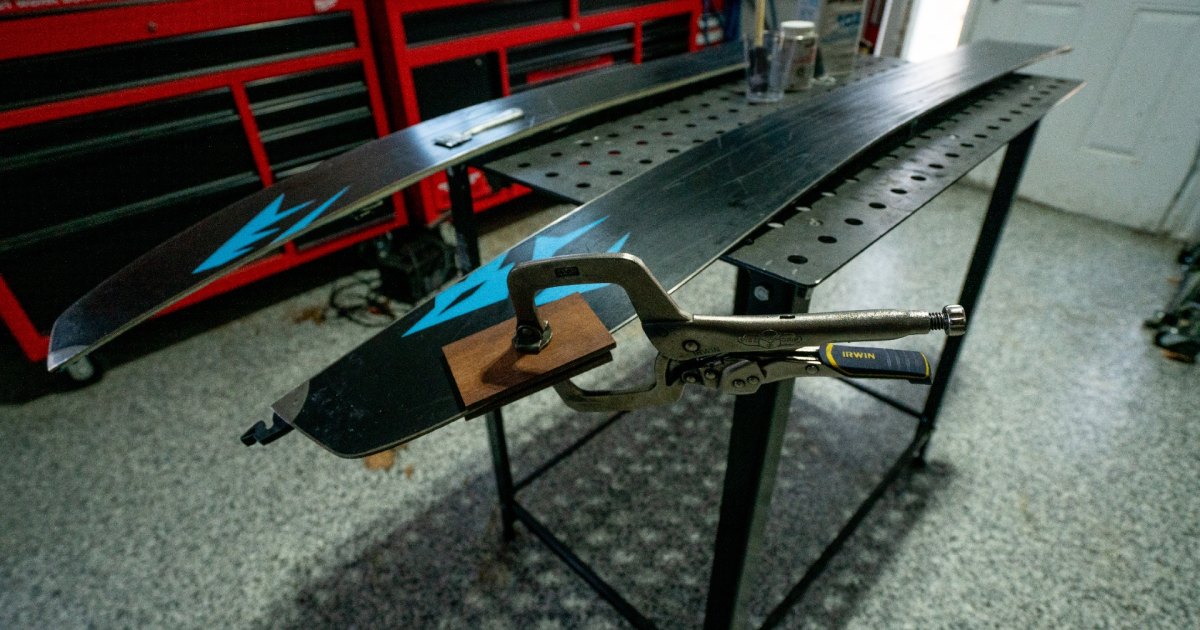
DIY Ski and Snowboard Repairs: #2. Delaminated Top Sheets
The vinyl coating atop skis or snowboards is highly susceptible to damage. Chipping or peeling of the top sheet can happen by running directly into hard surfaces or other riders. Minor delamination can easily spread, so be sure to get the impacted area under control as soon as possible.
Here’s what you’ll need:
- Razor blade
- Clamp
- Cardboard or two small pieces of wood
- Epoxy
- Medium-grit sandpaper
- Hairdryer (optional)
Directions:
- Use the razor blade to clean up the inside of the gash and remove any excess pieces of debris that may be wedged between the top sheet and fiberglass. Once clean, ensure the board is completely dry (the goal is to eliminate any trapped moisture, or the board will rot).
- Spread as much epoxy into the wound as possible with the razor blade. To ensure the epoxy seeps deep within, try heating the area up with a hairdryer, but make sure not to burn the material.
- Once the area is oozing with epoxy, sandwich it together between two pieces of cardboard, and clamp it together. Let sit for 24 hours.
- Remove cardboard and excess epoxy with razor blade or sandpaper.
DIY Ski and Snowboard Repairs: #3. Cracked or Dented Edges
A cracked or deformed edge on skis or a snowboard calls for immediate attention. This damage is frequently caused by harsh impacts with boxes and rails, or simply when your gear falls over while leaning up against the chalet.
Here’s what you’ll need:
- Hammer
- Flathead screwdriver
- Razor blade
- Cardboard or two small pieces of wood
- Epoxy
- Medium-grit sandpaper
- Clamp
- Hairdryer (optional)
Directions:
- Using a hammer and a flathead screwdriver, manipulate the edge back into its original position. It may be a finicky process, but precision here will make the next steps much easier.
- Clean out the “wound” with a razor blade and remove any excess dirt or materials. Ensure the board is moisture-free before you begin your repairs. Once the board is clean and dry, wedge your razor blade into the wound and spread open the side and base around the cracked or dented edge.
- Mix up your epoxy and spread it into the wound. Use a hairdryer to heat up and liquify the epoxy to allow it to further seep into the core (but be careful not to melt or burn the base or top sheet).
- Once the area of oozing with epoxy, sandwich it together between two pieces of cardboard, and clamp it together. Let sit for 24 hours.
- Sand off the excess epoxy, repair any base damage with P-tex, and run a gummy or soft stone over the repaired area.
For access to exclusive gear videos, celebrity interviews, and more, subscribe on YouTube!
Source link