
No products in the cart.
Outdoor Adventure
How Time Impacts An Image
13
Feb
Feb

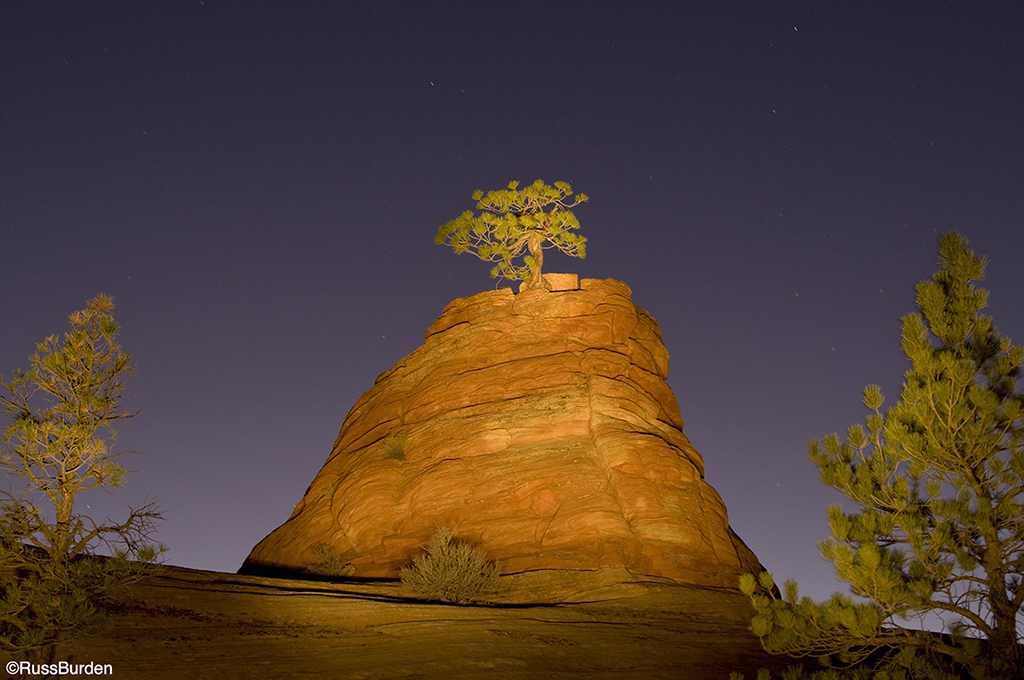
The shutter duration was 30 seconds. I used a flashlight throughout the entire exposure to add light to the main elements.
This week’s tip was conceived while driving through the mountains and listening to Deep Tracks on satellite radio. The sound of a lone cowbell filled the air, which was immediately followed by a fuzz guitar accompanied by a lead guitar. A huge smile filled my face as I immediately knew the iconic tune. It had been a long time since hearing “Time.” I immediately sang along while I thought about the concept of time regarding shutter speeds and how they impact the end result of a photo. If you know the lyric, sing along…… “Now the time has come, there are things to realize.” AH HA! A Tip of the Week—I share my thoughts on how the concept of time impacts an image.

Because both images were made under overcast daylight skies, I had to use ND filters to obtain slow enough exposures to provide the cotton candy effect on the water.
A high shutter speed is critical in stopping high-speed motion: race cars, sports action, birds in flight, freezing a falling drop of water, etc. Conversely, and the focus of this week’s tip, I want to show the concept of elongated time. I want the action to blur across the sensor, I want to exaggerate the motion of whatever moves and I want to share a few other instances where slow shutters are beneficial.

Both were made in low light at dawn. Each needed a small working aperture to obtain the required front-to-back depth of field. The resulting shutter speeds: the image on the left was 1 second; the one on the right was 14 seconds.
The Obvious
Common sense and acquired photographic knowledge tell you that slow shutters are necessary for low-light situations: dawn and dusk, star trails, city lights at night, to cover expanded depth of field with small apertures, indoors, etc. But that’s not what this week’s tip is about. This week I concentrate on how and why you want to use slow shutters during the day to get creative. I also throw in a few other examples of “slow down, you’re movin’ too fast.”

The violin was made indoors using a modeling light and studio strobe. At the end of a 2-second exposure, while I moved the camera, I fired the strobe to freeze the action. Thunder Bolt was zoomed and stalled. Tripod mounted, I started with 1/2 second and no movement, zoomed the lens, and at the end of the zoom I stalled another 1/2 second.
The Basics
During daylight hours, you have to cut back on the amount of existing light to use slow shutter speeds. The easiest way is with neutral-density filters. They come in strengths of one to 10 stops. I own a three stop, six stop and a variable neutral-density filter in which I can dial in up to 10 stops. Your viewfinder will be dark, so it’s best to create your composition and then attach the ND filters. Pair ND filters with small apertures to net the longest possible exposure. The metering system in the camera will automatically adjust the exposure and provide a readout of how long the shutter needs to remain open.

The image of the snow geese was photographed at 1/15th of a second. For the trees, I used a pan and tilt head and slowly moved only the vertical access upward for 2.5 seconds.
Tripod It
Given the long exposure times you’ll utilize, it’s essential to use a hefty tripod. Winds can exacerbate an already tricky situation and there have been times I’ve had to call off a session as it was impossible to keep the camera still. At some point during the exposure, each gust ruined the file. Along with the tripod, use a cable release or remote trigger. Depending on the duration of the exposure, pressing the shutter may introduce too much camera movement.

I used the same principle of slow water to illustrate that anything that moves can depict motion. I threw sand on the rocks during a five second exposure so while it fell, it would have the same cotton candy effect as the water.
Technique
The more times you get into the field to create long shutter exposures, your success level will escalate. In turn, you’ll want to experiment with longer and longer exposure times. This being the case, enable long exposure noise reduction. It appears in the custom menu settings. Noise can be further reduced via software.
To learn more about this subject, join me on a photo safari to Tanzania. Visit www.russburdenphotography.com to get more information.
The post How Time Impacts An Image appeared first on Outdoor Photographer.
Source link